
Note: I completed these steps on our Power8 running V7R3 with all of the OpenSource options installed. You may have to figure out installing other options on lower IBM i OS levels.
I would suggest that before you configure the connection to the IBM i you install the above function using the following instructions.
1. Download the mktemp rpm from the following location and place into a suitable location on the IFS. In our case we installed into /QOpenSys/downloads which we created to use the perzl binaries originally. I do not think you actually need this to be installed for the build to work?
ftp://www.oss4aix.org/RPMS/mktemp/2. Call qp2term (or you can use your own terminal of choice) and cd to the /QOpenSys/downloads directory.
3. Install from the rpm using the following command.
rpm --install --nodeps --ignoreos --ignorearch mktemp-1.7-1.aix5.1.ppc.rpmNote:- you need the additional flags to allow the install.
These were the steps I followed to connect the IBM i PASE GCC compiler and tools to the Netbeans IDE.
1. Create a new remote build host in the IDE. Just right click the the project and drill down to the manage hosts option.

2. Select the add button to get the following dialog box.
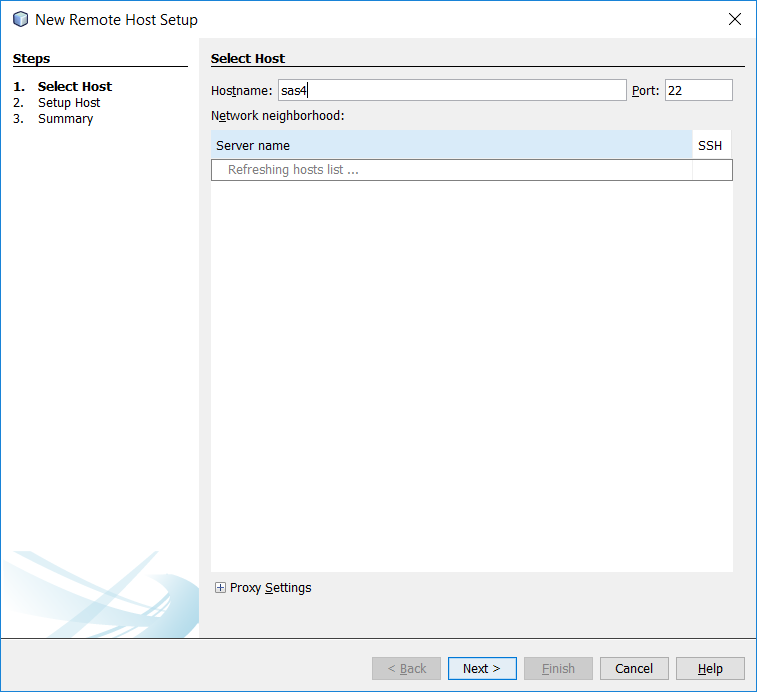
3. Click next, this will bring up the dialog to allow the login information to be entered.

4. Clicking next brings up the summary screen where you can see the information it retrieved from the remote IBM i.
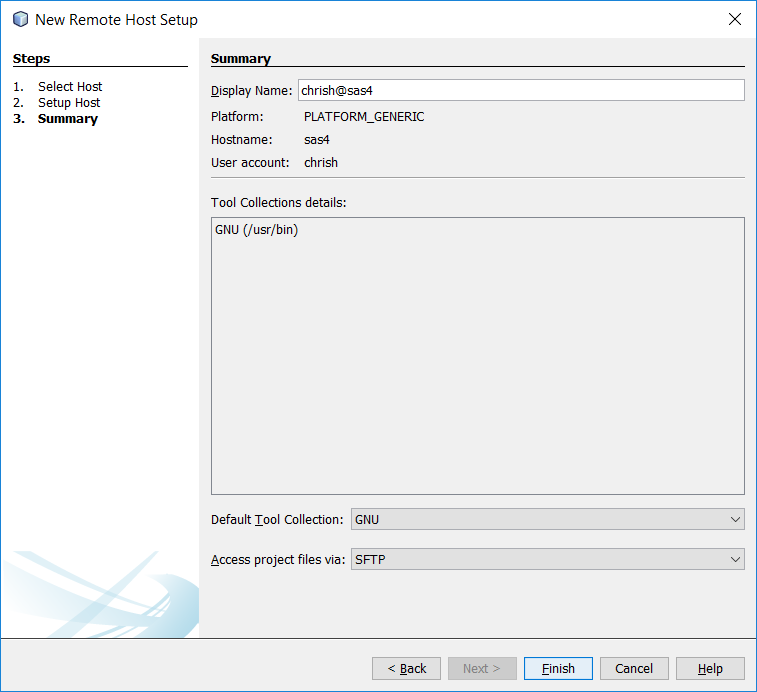
Pressing Finish will add the remote host information to the IDE hosts and set it as the selected host for the project.
Now all that you need to do is compile the file using the options available and you should see the following
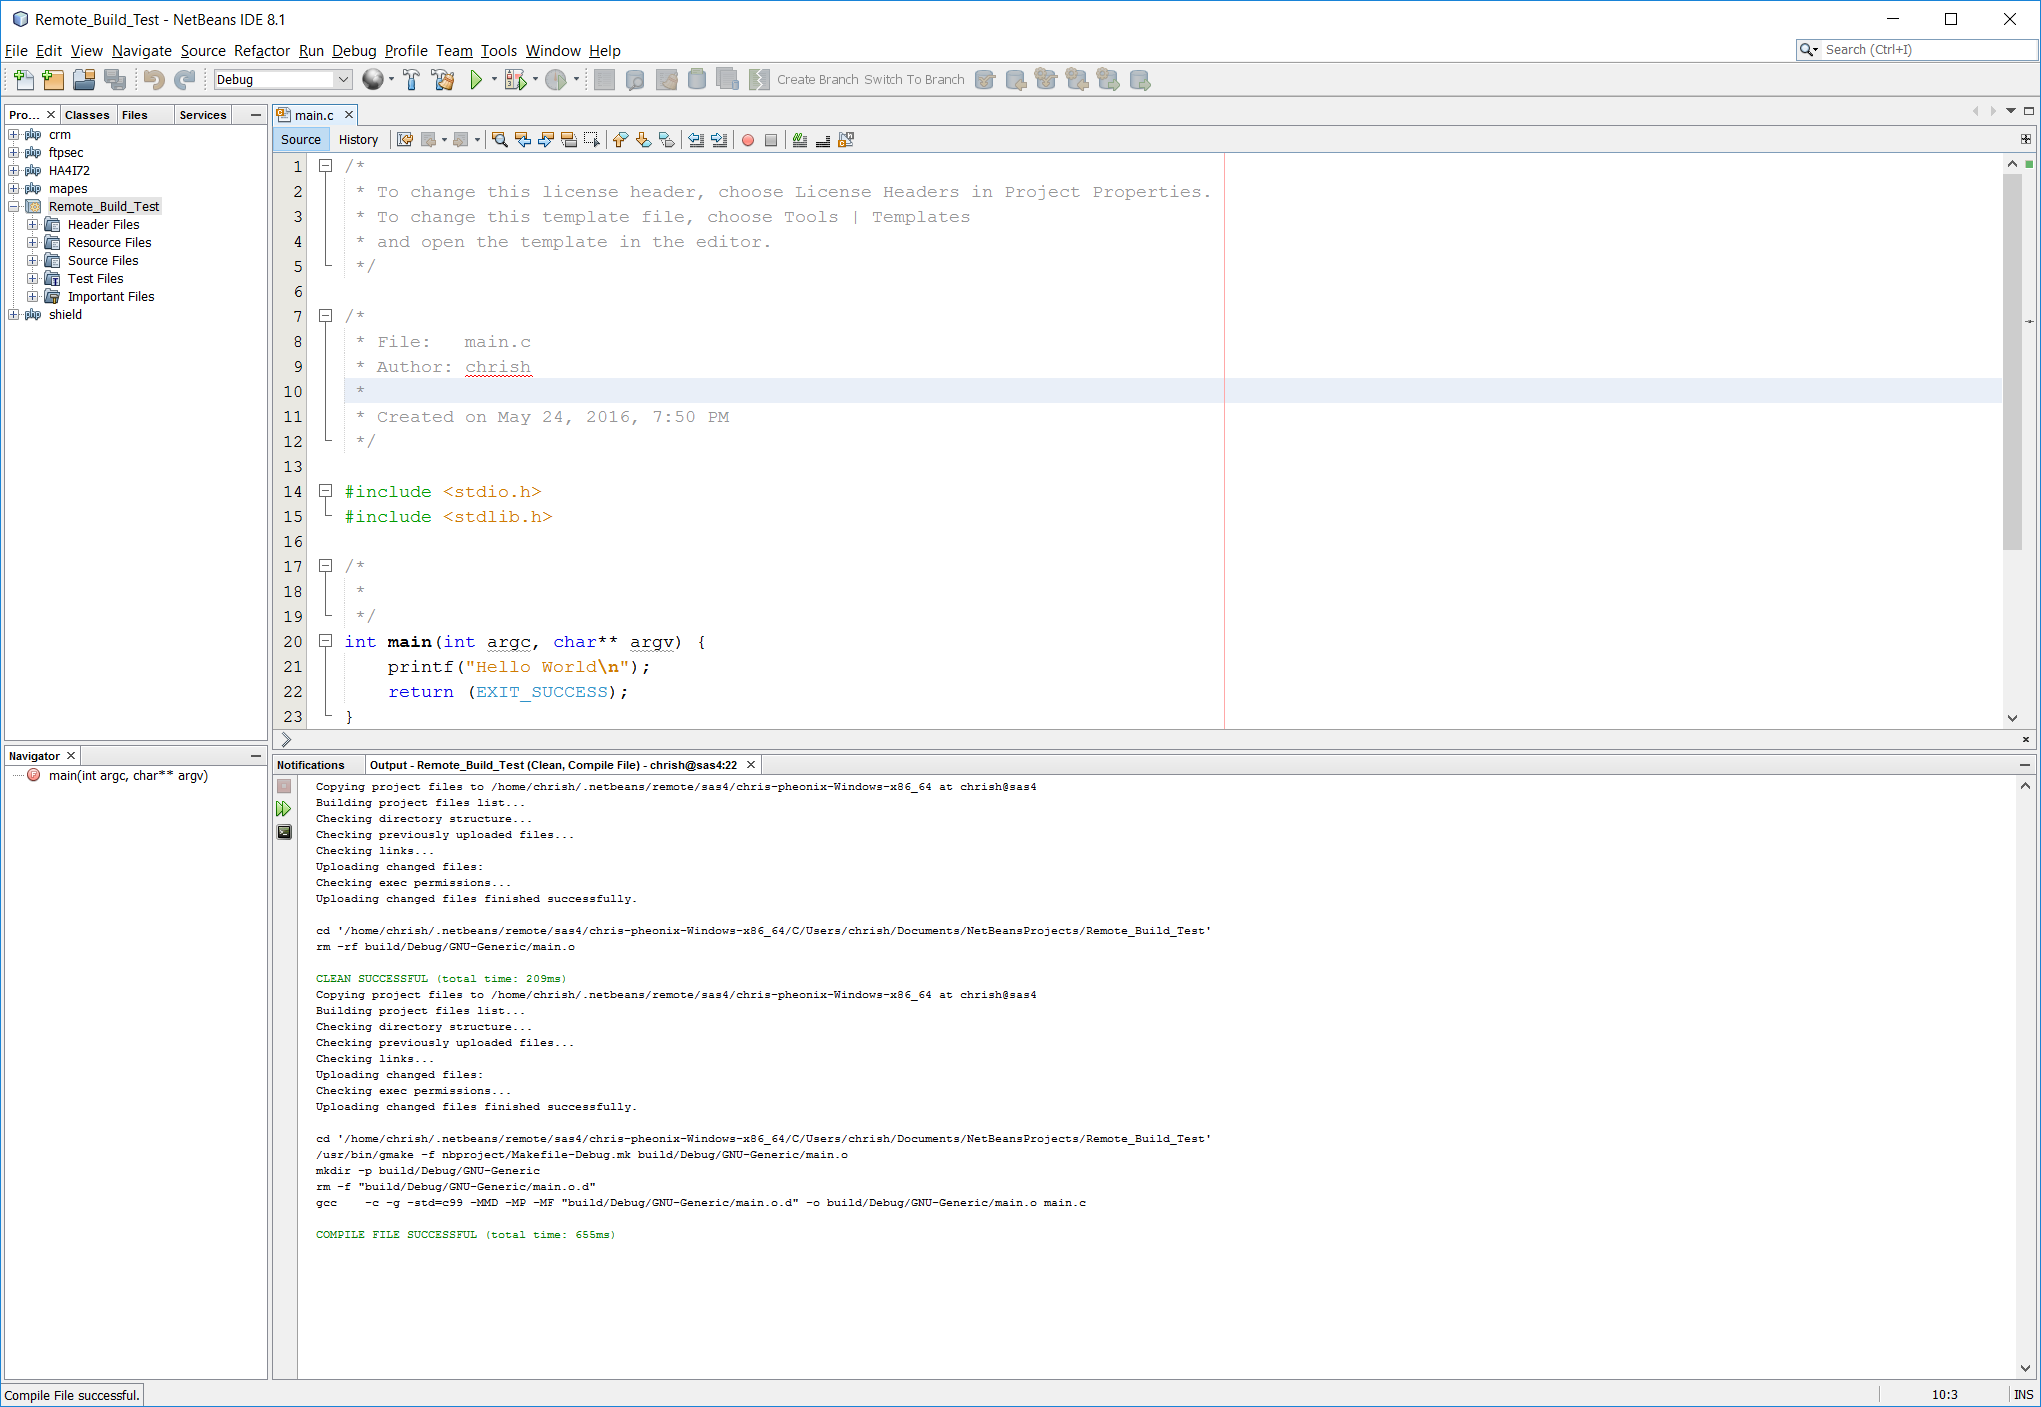
This is only the first stage as you will need to set the compiler options and a lot of other settings as part of a real build process, but at least we know the compiles work..
If you want to drill down to see what was compiled you will need to go to your home directory and drill down below the .netbeans *DIR to find the objects created.
Enjoy..
Chris..